
Kimi CLI – A command-line general-purpose agent tool launched by Moonshot AI
What is Kimi CLI?
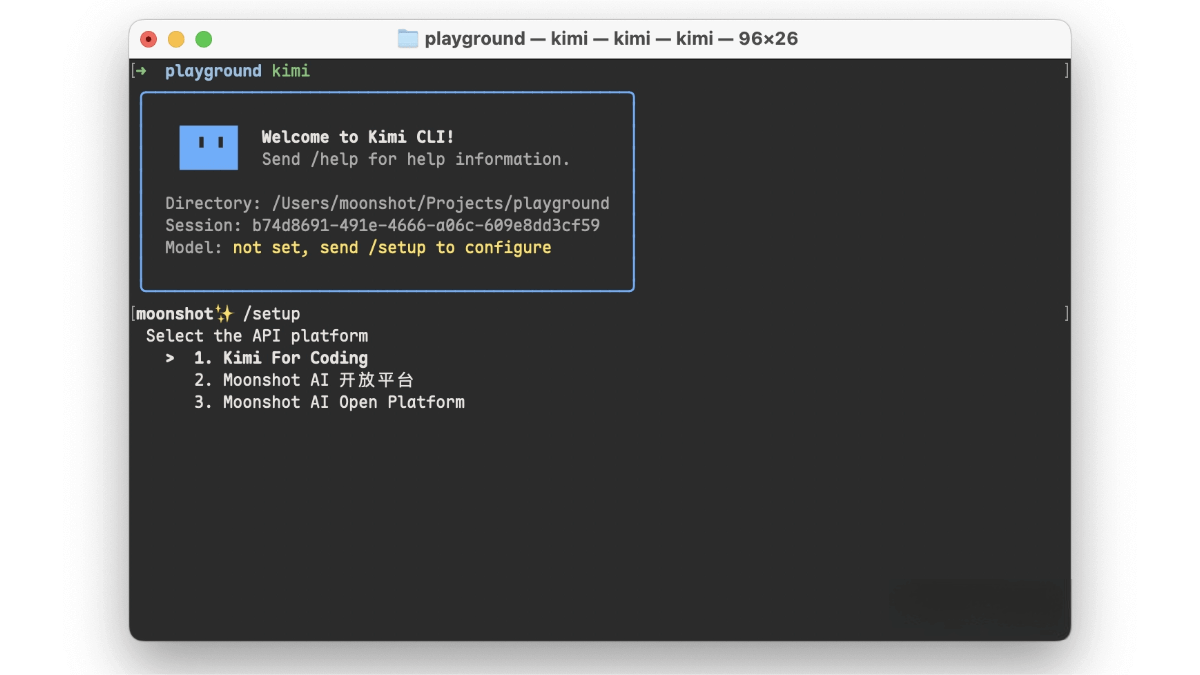
Kimi CLI is a command-line general-purpose agent tool launched by Moonshot AI, providing developers with efficient and convenient programming assistance and file management capabilities. It supports macOS and Linux systems and can be installed via the uv package manager, making installation simple and quick. On first use, users configure the tool using the /setup meta-command, entering an API Key and selecting the appropriate model—for example, Coding members can choose the “Kimi For Coding” model. Kimi CLI provides coding suggestions and code generation, and through its Shell mode, it can directly execute system commands, allowing users to manage files and view results easily. It also integrates with Zsh and the Zed editor, further improving development efficiency.
Main Features of Kimi CLI
-
Programming Assistance: Offers code generation, debugging suggestions, and logic optimization for multiple programming languages, boosting development efficiency.
-
File Management: Quickly read, edit, and generate files, supporting text, code, and other file types, simplifying file operations.
-
Interactive Shell Mode: Switch to Shell mode via a hotkey to execute system commands directly, facilitating file operations and result inspection.
-
Integration with Development Environments: Supports integration with development tools such as Zsh and Zed editor, seamlessly fitting into the development workflow.
-
Multi-Model Support: Users can select different models according to their needs; for instance, Coding members can use the “Kimi For Coding” model to meet diverse development requirements.
Kimi CLI Project Resources
-
GitHub Repository: https://github.com/MoonshotAI/kimi-cli
-
Documentation: https://www.kimi.com/coding/docs/kimi-cli.html
How to Use Kimi CLI
-
Installation: Install the
uvpackage manager first, then install Kimi CLI viauv. After installation, runkimi --versionto check if it was installed successfully. -
Configuration: On first run, enter the
/setupmeta-command, follow the prompts to input the API Key, and select the appropriate model. -
Launch: Navigate to the project directory in the command line and run the
kimicommand to start Kimi CLI. -
Using Shell Mode: Switch to Shell mode with the
Ctrl-Khotkey to execute system commands. -
Zsh Integration: Install the
zsh-kimi-cliplugin and enable it in~/.zshrc. Afterwards, you can enter Kimi CLI mode in Zsh usingCtrl-K. -
Zed Editor Integration: Add Kimi CLI configuration to the Zed configuration file, then create a Kimi CLI Thread in the Zed sidebar.
-
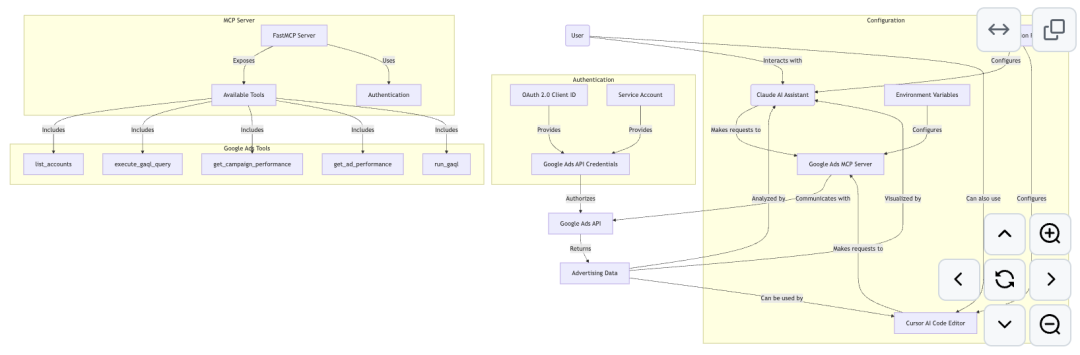
MCP Tool Access: Specify the MCP configuration file path using the
--mcp-config-fileparameter to integrate MCP tools with Kimi CLI. -
Help: Run
kimi --helpto view more commands and options.
Application Scenarios of Kimi CLI
-
Code Generation and Optimization: Quickly generate code snippets, functions, or complete scripts, saving time while providing code optimization suggestions to improve quality.
-
Problem Troubleshooting and Debugging: Helps developers analyze code issues, offering debugging advice and solutions to accelerate problem resolution.
-
Documentation and Comments: Automatically generates code comments and documentation, helping developers understand and maintain code more efficiently.
-
File Operations and Management: Rapidly read, edit, and generate files across multiple formats, simplifying file handling and boosting productivity.
-
Learning and Teaching: Provides coding guidance and sample code for beginners to learn faster, and can also serve as a teaching tool to explain programming concepts.
-
Team Collaboration: Team members can share and reuse code snippets, solutions, and best practices, promoting knowledge sharing and collaboration.
© Copyright Notice
The copyright of the article belongs to the author. Please do not reprint without permission.
Related Posts


No comments yet...